DST Files for Hats: Why Cap Embroidery Digitizing is Different (And How to Get it Right)
If you've ever stitched the same logo on a shirt and then tried it on a cap, you've probably noticed the slight difference. A design that looks good on flat fabric can shift, gap, or lose its shape on a hat because of the curved front and center seam. That's where many embroidery problems begin. A well prepared DST file design is the difference between a clean looking cap and one that ends up in the reject pile.
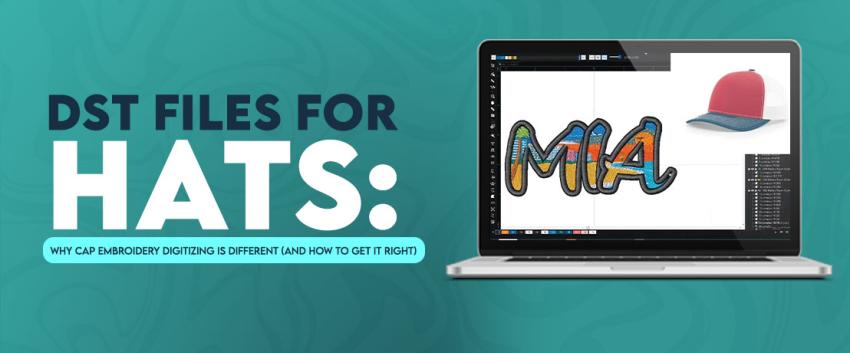
I learned this after digitizing logos for businesses that wanted matching polos and baseball caps. The shirts stitched beautifully, but the first cap sample didn't. After adjusting the stitch direction, density & placement instead of blaming the machine, the logo stitched exactly as expected. Pretty quickly, I realized that using the same DST file for flat garments rarely works on hats. Good custom hat embroidery digitizing starts by understanding how a cap behaves inside the frame before a single stitch goes down.
Key Factors That Affect DST Files for Hats
Digitizing for hats takes more planning than many people expect. A curved surface changes the way stitches behave & every decision made during digitizing affects the finished embroidery. Basically, success starts long before the machine begins stitching.
When I review customer files, I pay close attention to many details before approving them for cap embroidery. Small adjustments at this stage save time & effort.
Cap structure matters. Structured caps, unstructured caps, trucker hats & performance hats all react differently during stitching. A single setting rarely works for every style.
Logo size changes the result. Small text & thin details need simplification because tiny elements are invisible on curved surfaces.
Fabric type plays a big role. Cotton twill, canvas & polyester stretch differently, so stitch settings should match the material instead of following one standard rule.
Center seam affects every design. Thick seams push stitches away from their planned path, especially when important details cross the middle of the cap.
Machine setup works together with digitizing. Even a quality machine depends on a properly prepared design created with reliable embroidery digitizing software.
Hoop Size and Cap Frame Limitations
The cap frame controls how the hat stays in position during stitching. Understanding its limits helps prevent many common embroidery problems.
Stay inside the embroidery area. Every cap frame has a maximum stitching field. Keeping important details inside that space helps maintain clean embroidery.
Leave room around the edges. Designs placed too close to the border can shift slightly while stitching, making the finished logo look uneven.
Avoid oversized artwork. Large logos usually need resizing or redesigning instead of shrinking every element.
Consider visor clearance. Some designs look centered on screen but sit too close to the visor once the hat is framed.
Test different cap styles. Snapbacks, fitted caps & trucker hats need small placement adjustments even when using the same logo.
Stitch Density for Curved Surfaces
Getting stitch density right is one of the biggest differences between flat embroidery and cap embroidery. A hat bends around the front panel, so stitches react differently than they do on a flat piece of fabric. Basically, adding more stitches doesn’t always create better embroidery.
Keep the density balanced. Heavy stitching makes the front panel stiff and increases the chance of puckering. A balanced stitch count helps the design stay clean without putting too much stress on the fabric.
Adjust for different materials. Cotton, polyester & performance fabrics all react differently. I usually make small density changes after looking at the cap material instead of using the same values every time.
Watch small lettering carefully. Tiny text with very dense stitches closes up after embroidery. Opening the spacing slightly usually gives sharper letters.
Test before stitching a full order. A sample cap quickly shows whether the density needs another adjustment. Spending a few extra minutes here saves much more time later.
Match density with the design style. A bold logo carries slightly more stitching than a detailed logo with fine lines and small shapes.
Underlay Push & Pull Compensation on Caps
Many people focus only on the top stitches, but the embroidery underneath does just as much work. Good underlay creates a solid base, while push-pull compensation keeps the design looking balanced after stitching.
Choose the right underlay. Edge walk, center walk, or zigzag underlay each has a different purpose. The best choice depends on the shape and size of the design.
Control fabric movement. Underlay helps stabilize the cap before the top stitches begin. This reduces shifting and improves stitch quality.
Compensate for stitch pull. Every stitch pulls the fabric slightly. Without proper compensation, circles become oval shapes and straight edges may no longer look straight.
Protect small details. Thin outlines and narrow columns need extra attention because they change shape more easily on curved cap panels.
Review every logo separately. I have seen two logos with almost the same size need completely different compensation settings because their stitch directions were different.
Placement and Centering on the Cap
Even a perfectly digitized design looks wrong if it sits too high, too low, or slightly off center. Proper placement makes the embroidery look professional from every angle.
Use the center seam as a guide. The seam helps align the logo, but important design elements should not depend on the seam for their shape.
Keep visual balance in mind. Some logos look centered mathematically but appear off once stitched. I usually check the design on caps before approving it.
Leave enough space above the visor. Crowding the bottom of the design makes the embroidery look compressed, especially on structured hats.
Consider the logo shape. Wide logos and tall logos need different positioning. Moving the design a few millimeters creates a much better appearance.
Frame the cap carefully. A well digitized file can’t correct a poorly framed cap. Taking time during setup makes a noticeable difference in the final embroidery.
Common Mistakes When Digitizing DST Files for Hats
Most cap embroidery problems begin before the machine starts stitching. The good news is that these mistakes are easy to avoid once you know what to check.
Using a flat garment design on a cap. A logo created for shirts needs editing before it stitches properly on a curved cap.
Ignoring the center seam. Thin letters or small details placed directly over the seam lose their shape.
Adding too much detail. Very small text, tiny outlines & fine decorative elements rarely stitch as clearly on hats as they do on flat fabrics.
Using one setting for every cap. Different cap styles respond differently, so copying the same digitizing settings every time creates inconsistent results.
Skipping a sample stitch out. Even experienced digitizers test important designs before moving to larger embroidery projects.
Tips to Get Cap Embroidery Right the First Time
Good cap embroidery starts with careful planning, not guesswork. Over the years, I have noticed that the best looking hats usually come from small adjustments made before the first stitch. Those extra few minutes can save time later.
Keep the design simple when needed. If a logo has very small details, clean it up before digitizing. Clear shapes almost always stitch better than artwork packed with tiny elements.
Measure the embroidery area first. Every cap style has its own stitching space. Checking the available area before digitizing helps prevent resizing problems later.
Use the right needle and thread. A quality needle, the correct thread weight & proper machine tension work together to create smooth embroidery with fewer thread breaks.
Stitch a sample before a large order. I always like seeing one finished cap before moving ahead. A sample quickly shows if the lettering, spacing, or stitch coverage needs a small adjustment.
Check the design from different angles. Look at the cap from the front and both sides. Sometimes a logo appears centered on the machine but looks slightly different once the hat is worn.
Reduce unnecessary jump stitches. A cleaner stitch path helps the embroidery look more professional and cuts down on trimming after the machine finishes.
Pay attention to thread direction. Stitch direction affects how light reflects from the embroidery. Small changes make a logo look sharper and more balanced.
Save separate versions for hats and flat garments. I rarely use one embroidery file for every product. Keeping individual versions helps maintain consistent quality across different items.
FAQs
What makes DST files for hats different from other embroidery file formats?
DST files created for hats contain stitch information planned specifically for curved surfaces. Unlike flat garment designs, cap embroidery needs adjustments for the center seam, stitch direction, underlay & density so the finished logo keeps its shape during stitching.
How to digitize embroidery specifically for caps using DST files?
Start by measuring the embroidery area on the cap. Then simplify very small details if needed, adjust stitch density, add suitable underlay, apply push-pull compensation, and test the design on a sample cap before using it on larger embroidery designs.
How to convert standard embroidery designs to DST format for hats?
Instead of exporting the artwork into DST format, edit the design first for cap embroidery. Review the stitch angles, spacing, compensation, and placement. After making those changes, export the final version and test it on the same style of cap you plan to embroider.
DST file requirements for professional hat embroidery.
A professional hat embroidery file should include balanced stitch density, clean stitch paths, proper underlay, accurate push-pull compensation, suitable sizing for the cap frame, and careful placement that works with the center seam. Testing the design on an actual cap before final stitching is always a smart final step.