When I decided to update my bathroom, one of the first things I wanted to tackle was the installation of Bathroom Cabinets. It seemed like a simple enough task, but once I started looking into it, I realized that there’s more to it than just buying a cabinet and hanging it up. The good news is, with the right tools, some basic knowledge, and a little bit of patience, I was able to complete the job on my own.
In this guide, I’ll walk you through everything I learned during my Bathroom Cabinet Installation process. Whether you're replacing an old cabinet or installing a new one from scratch, this step-by-step guide will make the job easier and more manageable.
Why Installing Bathroom Cabinets Can Be a DIY Project
For most homeowners, installing Bathroom Cabinets may seem like something only a professional could do. However, with the right instructions, tools, and materials, it’s actually a great DIY project that can save money and give me a sense of accomplishment. Here are a few reasons why installing bathroom cabinets can be a DIY project:
Cost-Effective: Hiring a professional to install the cabinet can be expensive. By doing it myself, I can save money.
Personalized Design: When I install my cabinets, I have control over the design, placement, and style.
Satisfaction: There’s something incredibly satisfying about completing a home improvement project on my own.
By the end of this guide, you'll feel confident and ready to take on the task of installing your bathroom cabinet with ease.
Tools and Materials I’ll Need
Before I get started, I’ll need to gather a few tools and materials. Here's a list of the basic tools that made my installation process easier:
Measuring tape – to ensure accurate measurements of the space and cabinet.
Level – to ensure that the cabinet is mounted straight and level.
Screwdriver (or drill) – to screw the cabinet into place.
Stud finder – to locate the wall studs for a secure installation.
Screws and anchors – depending on the wall type, I’ll need screws for the cabinet or wall anchors for extra support.
Pencil – to mark the placement of the cabinet.
Shims – to level out any uneven surfaces.
Additionally, I’ll need the bathroom cabinet itself, which should be properly measured to fit the space.
If you’re looking for a wide selection of cabinets, consider checking out bathroom cabinet installation options that suit your style and needs.
Step 1: Measure and Prepare the Space
Before I can start installing, I first need to measure the space to ensure that the cabinet will fit perfectly. Accurate measurements are crucial to avoid any issues later on. Here’s how I did it.
Measure the Width, Height, and Depth of the Space
I carefully measured the width, height, and depth of the area where the cabinet will go. This will help me choose the right cabinet size and ensure it fits snugly. I also checked the space for obstructions like pipes or electrical outlets that might interfere with the installation.
Mark the Placement on the Wall
Next, I used a pencil to mark the placement of the cabinet on the wall. I made sure that the marks were level using a level tool. This is important because even a slight tilt can throw off the whole cabinet.
Locate the Wall Studs
For a secure installation, I needed to locate the wall studs using a stud finder. Cabinets are heavy, so I needed to attach them securely to the studs to avoid them falling down later.
Step 2: Install the Wall Brackets
Many Bathroom Cabinets come with wall brackets or mounting rails that help secure the cabinet to the wall. If the cabinet didn’t come with pre-installed brackets, I would need to install them myself.
Install the Brackets
Once I found the studs, I used a drill to install the brackets on the wall, ensuring they were level and spaced correctly. The brackets should be placed at the height where I want the bottom of the cabinet to rest.
Double-Check the Level
After installing the brackets, I used a level to ensure that the mounting brackets were perfectly horizontal. This is important to make sure that the cabinet won’t be crooked when it is hung.
Step 3: Hang the Cabinet
Now comes the fun part hanging the cabinet! This is when the measurements and preparation pay off.
Lift the Cabinet onto the Brackets
I carefully lifted the bathroom cabinet and set it onto the mounted brackets. It’s important to have a second person to help with lifting and positioning the cabinet to avoid injury or mistakes.
Secure the Cabinet to the Wall
Once the cabinet was securely positioned, I used screws to fasten it to the wall. I made sure to drive the screws directly into the studs for maximum stability. Depending on the cabinet, I might also have had to attach the cabinet’s mounting rails or brackets to the studs.
Check for Level Again
Before fully tightening the screws, I made sure to double-check the level one more time. Ensuring that the cabinet is level before finishing the installation will prevent unevenness and issues down the line.
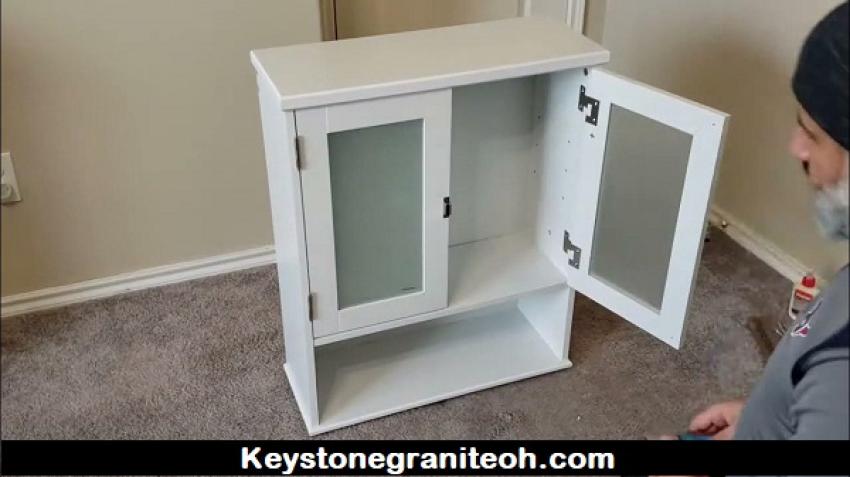
Step 4: Install the Doors and Shelves
Once the cabinet was securely attached to the wall, it was time to install the doors and shelves (if applicable).
Install the Doors
If the cabinet has doors, I attached the hinges according to the manufacturer’s instructions. I used screws to attach the doors to the cabinet frame, making sure they were aligned properly.
Install the Shelves
For cabinets with adjustable shelves, I inserted the shelf brackets at the desired height and placed the shelves inside the cabinet. This step was fairly easy, but I made sure that the shelves were level.
Step 5: Add the Finishing Touches
With the cabinet securely installed, it was time to add the finishing touches that give it a polished look.
Attach the Handles or Knobs
I installed the handles or knobs on the cabinet doors. I made sure to measure the distance between the handles to ensure they were placed symmetrically.
Seal the Cabinet (Optional)
In some cases, I applied a sealant to the edges or the back of the cabinet to protect it from moisture. This is especially important for bathroom cabinets that will be exposed to steam and humidity.
Step 6: Clean Up and Enjoy
Now that the bathroom cabinet was fully installed, I took a step back to admire my work. I cleaned up any dust or debris from the installation process and organized the inside of the cabinet. It was incredibly satisfying to see the finished product, and I couldn’t wait to start using the cabinet for storage.
FAQs
How long does it take to install a bathroom cabinet?
The installation of a bathroom cabinet usually takes a few hours, depending on the complexity of the cabinet and the preparation needed. If it's a simple replacement, it may take 2-3 hours, but custom installations might take longer.
Do I need professional help to install a bathroom cabinet?
While it is possible to install a bathroom cabinet on your own, especially with the right tools and instructions, some homeowners may prefer professional help, especially for large or custom cabinets that require specialized mounting.
Can I install a bathroom cabinet without drilling into the wall?
In most cases, drilling into the wall is necessary to secure the cabinet to the studs. However, there are some freestanding options or cabinets with special mounting systems that may not require drilling.
How do I choose the right size bathroom cabinet for my space?
To choose the right size, measure the available wall space carefully, accounting for the height, width, and depth of the area where the cabinet will go. Ensure there is enough space for easy access to the cabinet and that it complements the rest of the bathroom layout.
Can I install a bathroom cabinet on my own if I have limited DIY experience?
Yes, you can install a bathroom cabinet on your own with basic DIY skills. The key is to follow step-by-step instructions, use the right tools, and measure carefully. If you're unsure, don't hesitate to ask for help from a friend or a professional.