
Introduction:
Custom embroidery is a centuries-old art form, still, moment, it flourishes in a world which is enhanced by the advancement of technology. The process of transferring an original delineation on paper, to an exquisitely created exaggerated patch is an accord of art and ultramodern tools. The digital workflow, also known as embroidery digitization has revolutionized the assiduity by furnishing lesser perfection, creative and effectiveness. We will walk through the step-by-step procedure of turning a hand-drawn delineation into a substantiated embroidery patch.
1. From Idea to Paper: The First Creative Step
Each custom patch starts from an original idea. It can appear from any source, similar as a particular idea or brand’s image, or indeed a particular occasion. The first step is to restate the conception into a palpable shape generally by drawing sketches on paper.
Contrivers strictly sketch out their ideas taking into consideration the confines, shape and overall communication that the patch should communicate. Attention to detail is pivotal particularly for complicated ensigns and symbols or typography. Clear, clean sketches are the base for all embroidery processes.
While the spark for creativity occurs in this space, the true excitement begins when an idea is transferred from paper to the digital realm.
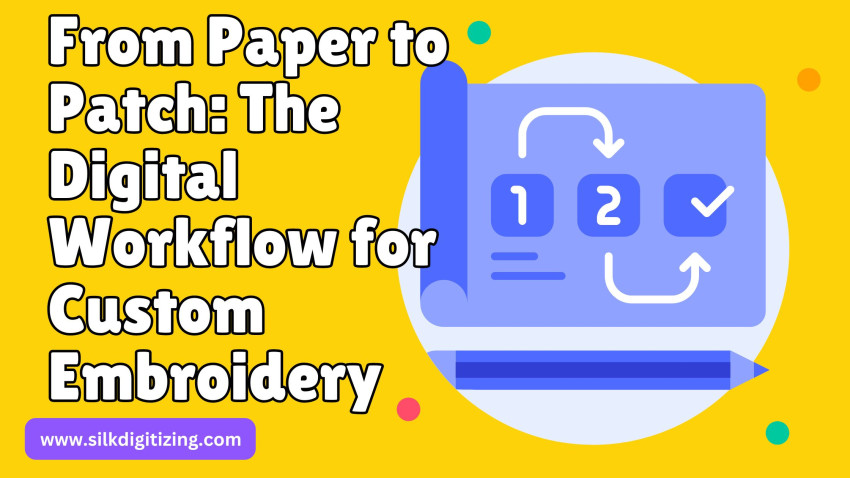
2. Digital Design Conversion: Enter the Digital World
After the design has been perfected on paper The coming step is changing it to digital format. This is fulfilled with graphic design software similar as Adobe Illustrator or CorelDraw. The ideal is to convert the sketch that you have drawn, principally making it vector plates that can be resized without compromising quality.
Vector conversion is essential since embroidery machines depend on mathematically precise points to interpret the designs. Straight lines warrant that the artwork will restate precisely when sutured. This process allows contrivers to experiment in color scheme, change the design rudiments, and gain an idea of what the patch will look like when it’s sutured.
In this stage, contrivers take into consideration factors like thread colors, sew types and textures that make their patch come to life. The digital interpretation gives contrivers the occasion to upgrade the details of the patch before the patch is transferred to product.
3. Digitizing: Bridging Design and Embroidery
Digitalizing is at the core of the process that converts digital designs to an exaggerated patch. This requires special software similar as Wilcom or Family PE Design, to transfigure the digital art into an image form that the embroidery machine are suitable to understand.
Then is how digitizing functions:
Stitch Path Creation: The digitizer defines the direction that the needle will follow in suturing the pattern. This is an important step because the order and direction of suturing affect the overall appearance and appearance of your patch.
Stitch Types: Multitudinous kinds of aches are employed to produce different textures and depth. For case, satin aches are perfect to outline, whereas filler aches are employed to fill larger areas.
Thread Colors: The design train should also contain information about thread colors. Certain software for digitizing allows contrivers to choose colors that correspond to the embroidery thread that’s used in the product.
Expert digitizers optimize designs for embroidery, taking into consideration different types of fabrics, thread weight, as well as the degree of complexity of the design in order to warrant you get the desirable outgrowth.
4. Choosing the Right Embroidery Machine
Once the digitization process is complete, the train is now ready for transfer onto an embroidery device. ultramodern machines can offer colorful options for personalization, including multi-needle machines, which can handle complicated designs that bear different color vestments.
The top embroidery machines like those made by Brother, Janome, and Bernina they can produce complex designs in a rapid-fire rate, while icing delicacy. The machine reads the digital train and also follows the pre-programmed stitching path to exaggerate the pattern on the fabric.
When it comes to small-scale product for a group or a group, or fulfilling large orders for businesses, the proper outfit can help in the quality and speed of product.
5. Fabric Selection and Preparation
The fabric that’s that is used to make the patch has a major impact on the process of sewing. Common fabrics include denim, cotton and twill, all furnishing a distinct appearance and continuity. The fabric must be tough suitable to take the pressure of the embroidery aches without shifting or bending the design.
Before beginning the embroidery the fabric is prepared with a backing in order to concentrate on furnishing fresh stability. This prevents stretching or movement in the process of embroidery. It also makes sure that the final patch keeps its form.
6. Embroidering the Patch: Bringing the Design to Life
After the design train has been downloaded and fabric trimmed and ready, it’s time for the machine to begin work. At this point it aches the pattern onto the fabric according to the exact instructions in the digital train.
That is where the real metamorphosis occurs. As layers are added, vestments are brought together to form the final patch. Grounded on the position of complexity of the pattern, this process may take anything from a many seconds to several hours.
Although machines do the maturity tasks, monitoring is vital to warrant that everything is running easily. occasionally, thread breaks or fabric shifts will bear homemade adaptations to save the quality in the layout.
7. Finishing Touches: Cutting, Backing, and Borders
After the embroidery is completed after which the patch goes into the final stage. Fabric is cut to the asked shape, generally with ray slice to achieve delicacy. Grounded on the purpose for which it’s intended the patch could have different backings similar as Velcro, tenacious, or suture-on druthers.
One of the last way is the addition of a border called an edge merrowed, which will seal patches’ edges to stop rasping. The border isn’t only a boost to continuity, but also provides the patch a smooth, competent finish.
8. Quality Control: Ensuring Perfection
Before patches are distributed they go through a strict quality-control process. Every patch is scanned to warrant that the aches are invariant and the colors are accurate and the design is in line with the original idea.
If excrescencies are set up The patch can be reworked or modified. Only after having passed these tests is the patch ready to be packed.
9. Packaging and Delivery: The Final Step
After quality control is completed and the patches are packaged and ready to be delivered. No matter if it’s just a single patch to wear for yourself, or hundreds for a company The final product will be a decoration, substantiated patch that’s ready to wear with confidence.
Conclusion: Mastering the Digital Workflow For Custom Embroidery
From a figure on a piece of paper a completely-realized embroidery patch The digital workflow of customizing embroidery can be an royal process that combines creativity with technology. exercising the power of digitizing software, vector conversion and sophisticated stitching machines, creatives are suitable to transfigure their designs into beautiful high-quality patches that capture all the rudiments of their idea.
Each step is strictly planned and carried out, the end result is a patch that’s distinctive in its color, detail and quality. The process of digitalization is the key to creating patches that are visually unique and economically feasible.


